
Channel letter shop drawings: a checklist of what to put on them
The letter schedule, faces, returns, trim cap, backs, LEDs, power supplies, mounting, weep holes and UL label that a fabricator and an installer need, with a real channel letter section as the example.

Channel letter shop drawings should answer every question the fabricator and the installer will have: a letter schedule, a dimensioned elevation, the face, trim cap, return and back materials and colors, the LEDs and power supplies, the wiring and penetrations, the mounting into the wall, weep holes, where the UL label goes and the electrical load, with the client's approval and a shop sign-off on the sheet.
Key takeaways
- Start with a letter schedule: every letter's height, width and return length, so the shop can cut and bend without measuring the art.
- Call out every material with its thickness, gauge, depth and color: the face, trim cap, returns and back.
- Show the lighting as a system: the LED modules, the Class 2 power supplies, where they live and the load in amps.
- Show how it mounts: fasteners into blocking, the wall build-up, sealed penetrations, and who designs the attachment when an engineer is required.
- Mark the weep holes and where the UL label goes, and get the client's approval and a shop sign-off before anything is cut.
What a shop drawing is for
A permit set shows a reviewer the sign is allowed and safe. A shop drawing tells your crew how to build it and your installer how to hang it. Every question it doesn't answer becomes a phone call, a guess or a remake, so the checklist below is what a front-lit channel letter set should answer before it goes to the floor.
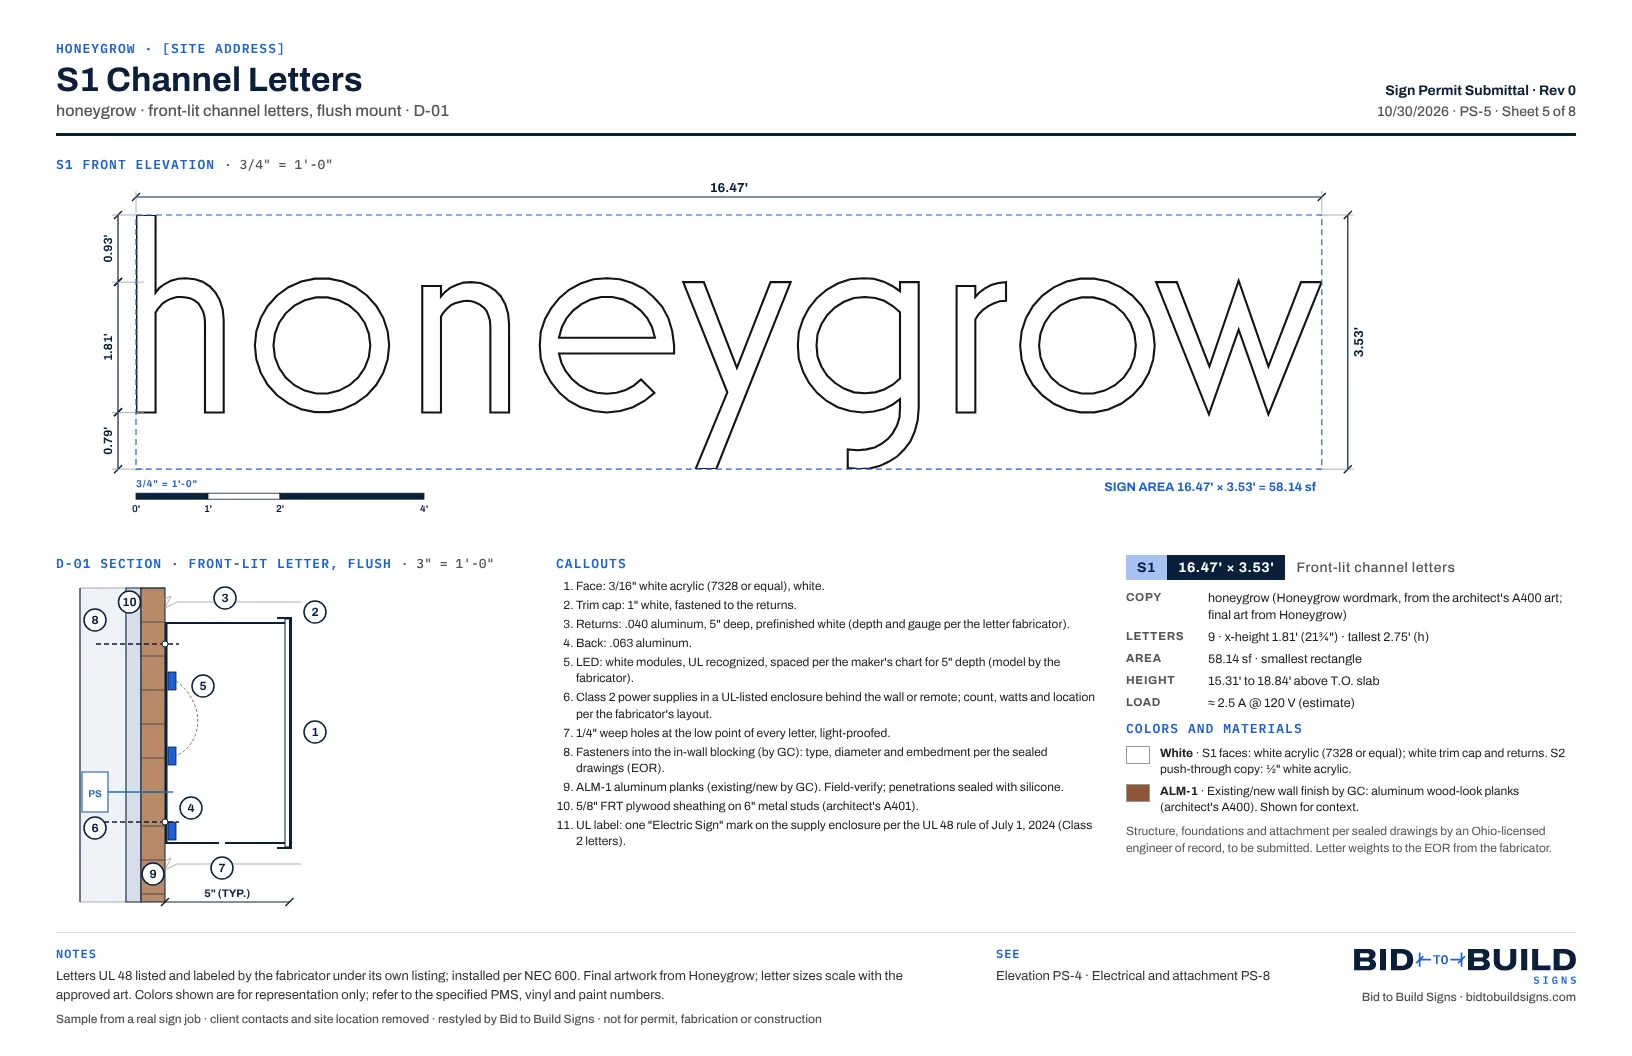
- Face: 3/16 inch white acrylic (7328 or equal), white.
- Trim cap: 1 inch, white, fastened to the returns.
- Returns: .040 aluminum, 5 inches deep, prefinished white; the depth and gauge are the letter fabricator's call.
- Back: .063 aluminum.
- LEDs: white modules, UL recognized, spaced per the maker's chart for a 5-inch depth.
- Power supplies: Class 2, in a UL-listed enclosure behind the wall or remote; the count, wattage and location per the fabricator's layout.
- Weep holes: 1/4 inch at the low point of every letter, light-proofed.
- Fasteners: into the in-wall blocking, with the type, diameter and embedment per the sealed drawings.
- Wall: field-verify the build-up and seal every penetration.
- UL label: letters fed only by Class 2 wiring can carry one Electric Sign label, typically on the housing with the branch circuit power and the Class 2 power supply.
The checklist
Title block and status
The job, the sign ID, the revision and date, the scale, and a clear proposed-for-approval status until the client signs. A shop drawing that looks final before it's approved is how the wrong color gets built.
Letter schedule
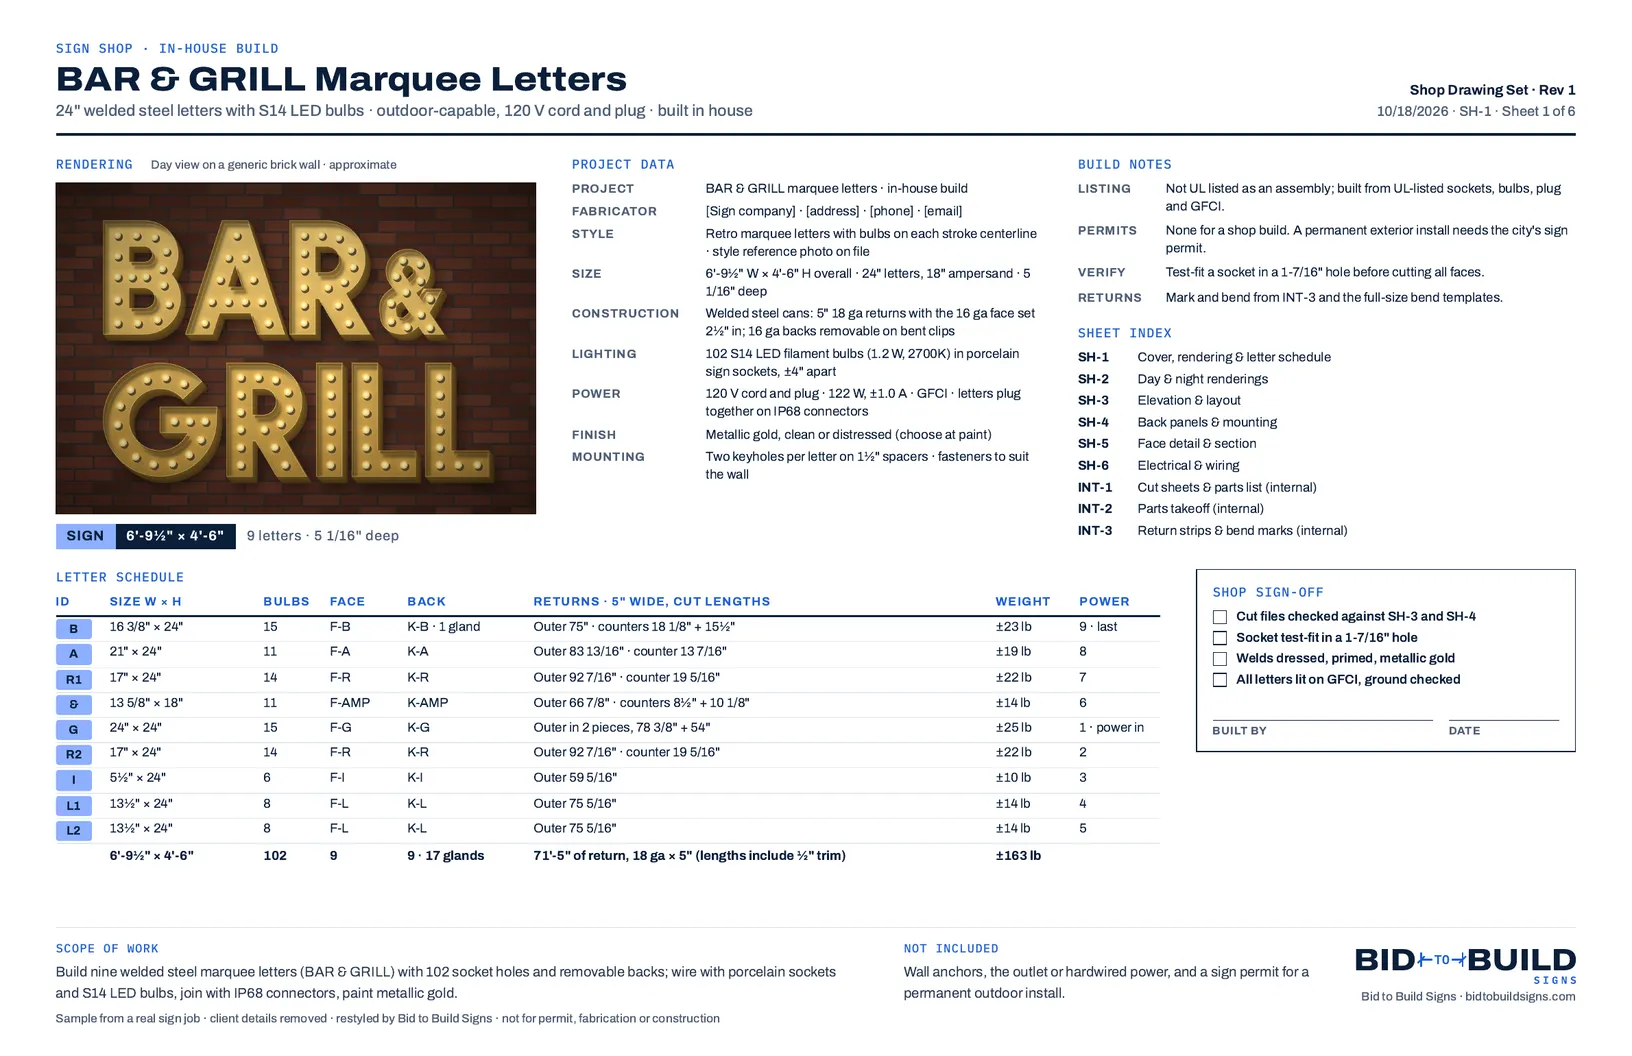
Every letter with its height, width, stroke and return length, plus the overall size. The marquee letter shop set we publish puts the letter schedule, with return lengths and weights, right on its cover sheet.
Dimensioned elevation
The overall width and height, letter heights (cap height and x-height), spacing and the layout on the wall, with the mounting height to the top or bottom of the letters.
Faces and colors
The material, thickness and color of each face, with vinyl or paint numbers, not "match the logo".
Returns, trim cap and backs
The material, gauge, depth and finish of the returns, the trim cap size and color, and the back material.
Lighting
The LED module, its color temperature, the spacing for the return depth, and the module count per letter if the fabricator wants it.
Power supplies and wiring
Class 2 power supplies, how many, their wattage and where they go; the wire path; and every penetration and how it's sealed.
Mounting
The fastener type and pattern, flush or on spacers, the wall build-up and the blocking, and a pattern or template for the installer. Where the jurisdiction requires it, a licensed engineer designs the attachment.
Weep holes
Weep holes at the low point of every letter, light-proofed so they don't show at night.
UL label and load
Where the UL label goes and the estimated load in amps at the supply voltage, so the electrician can size the circuit and the inspector can find the label.
Approval and sign-off
The client's approval of the copy, colors and size, and a shop sign-off before anything is cut. The marquee set carries its shop sign-off on SH-1.
By hand, or checking a workflow's draft
By hand, this is a designer redrawing the approved art in CAD, measuring every letter for the schedule and keeping the callouts in sync with the elevation through every revision. The shop drawings workflow draws the set from the approved drawings, with the letter schedule, elevations, sections and wiring tied to one geometry file, and your designer checks it before it goes to the floor.